Understanding the canvas
The canvas is your visual workspace — where you design, connect, and configure your product.
The canvas is where you build. It's a visual, drag-and-drop workspace — think of it like a whiteboard that's also fully functional. Every product you create on Productised is built here, and everything on it connects together to form your product's logic.
You don't need to understand any underlying technology to use the canvas. If you can arrange things visually and understand roughly how they connect, you have everything you need.
🎥 Video: A 45-second walkthrough showing a complete canvas — the AI Product node in the centre, an output node connected below it, with the settings panel open on the right.
What you'll see when you open the canvas
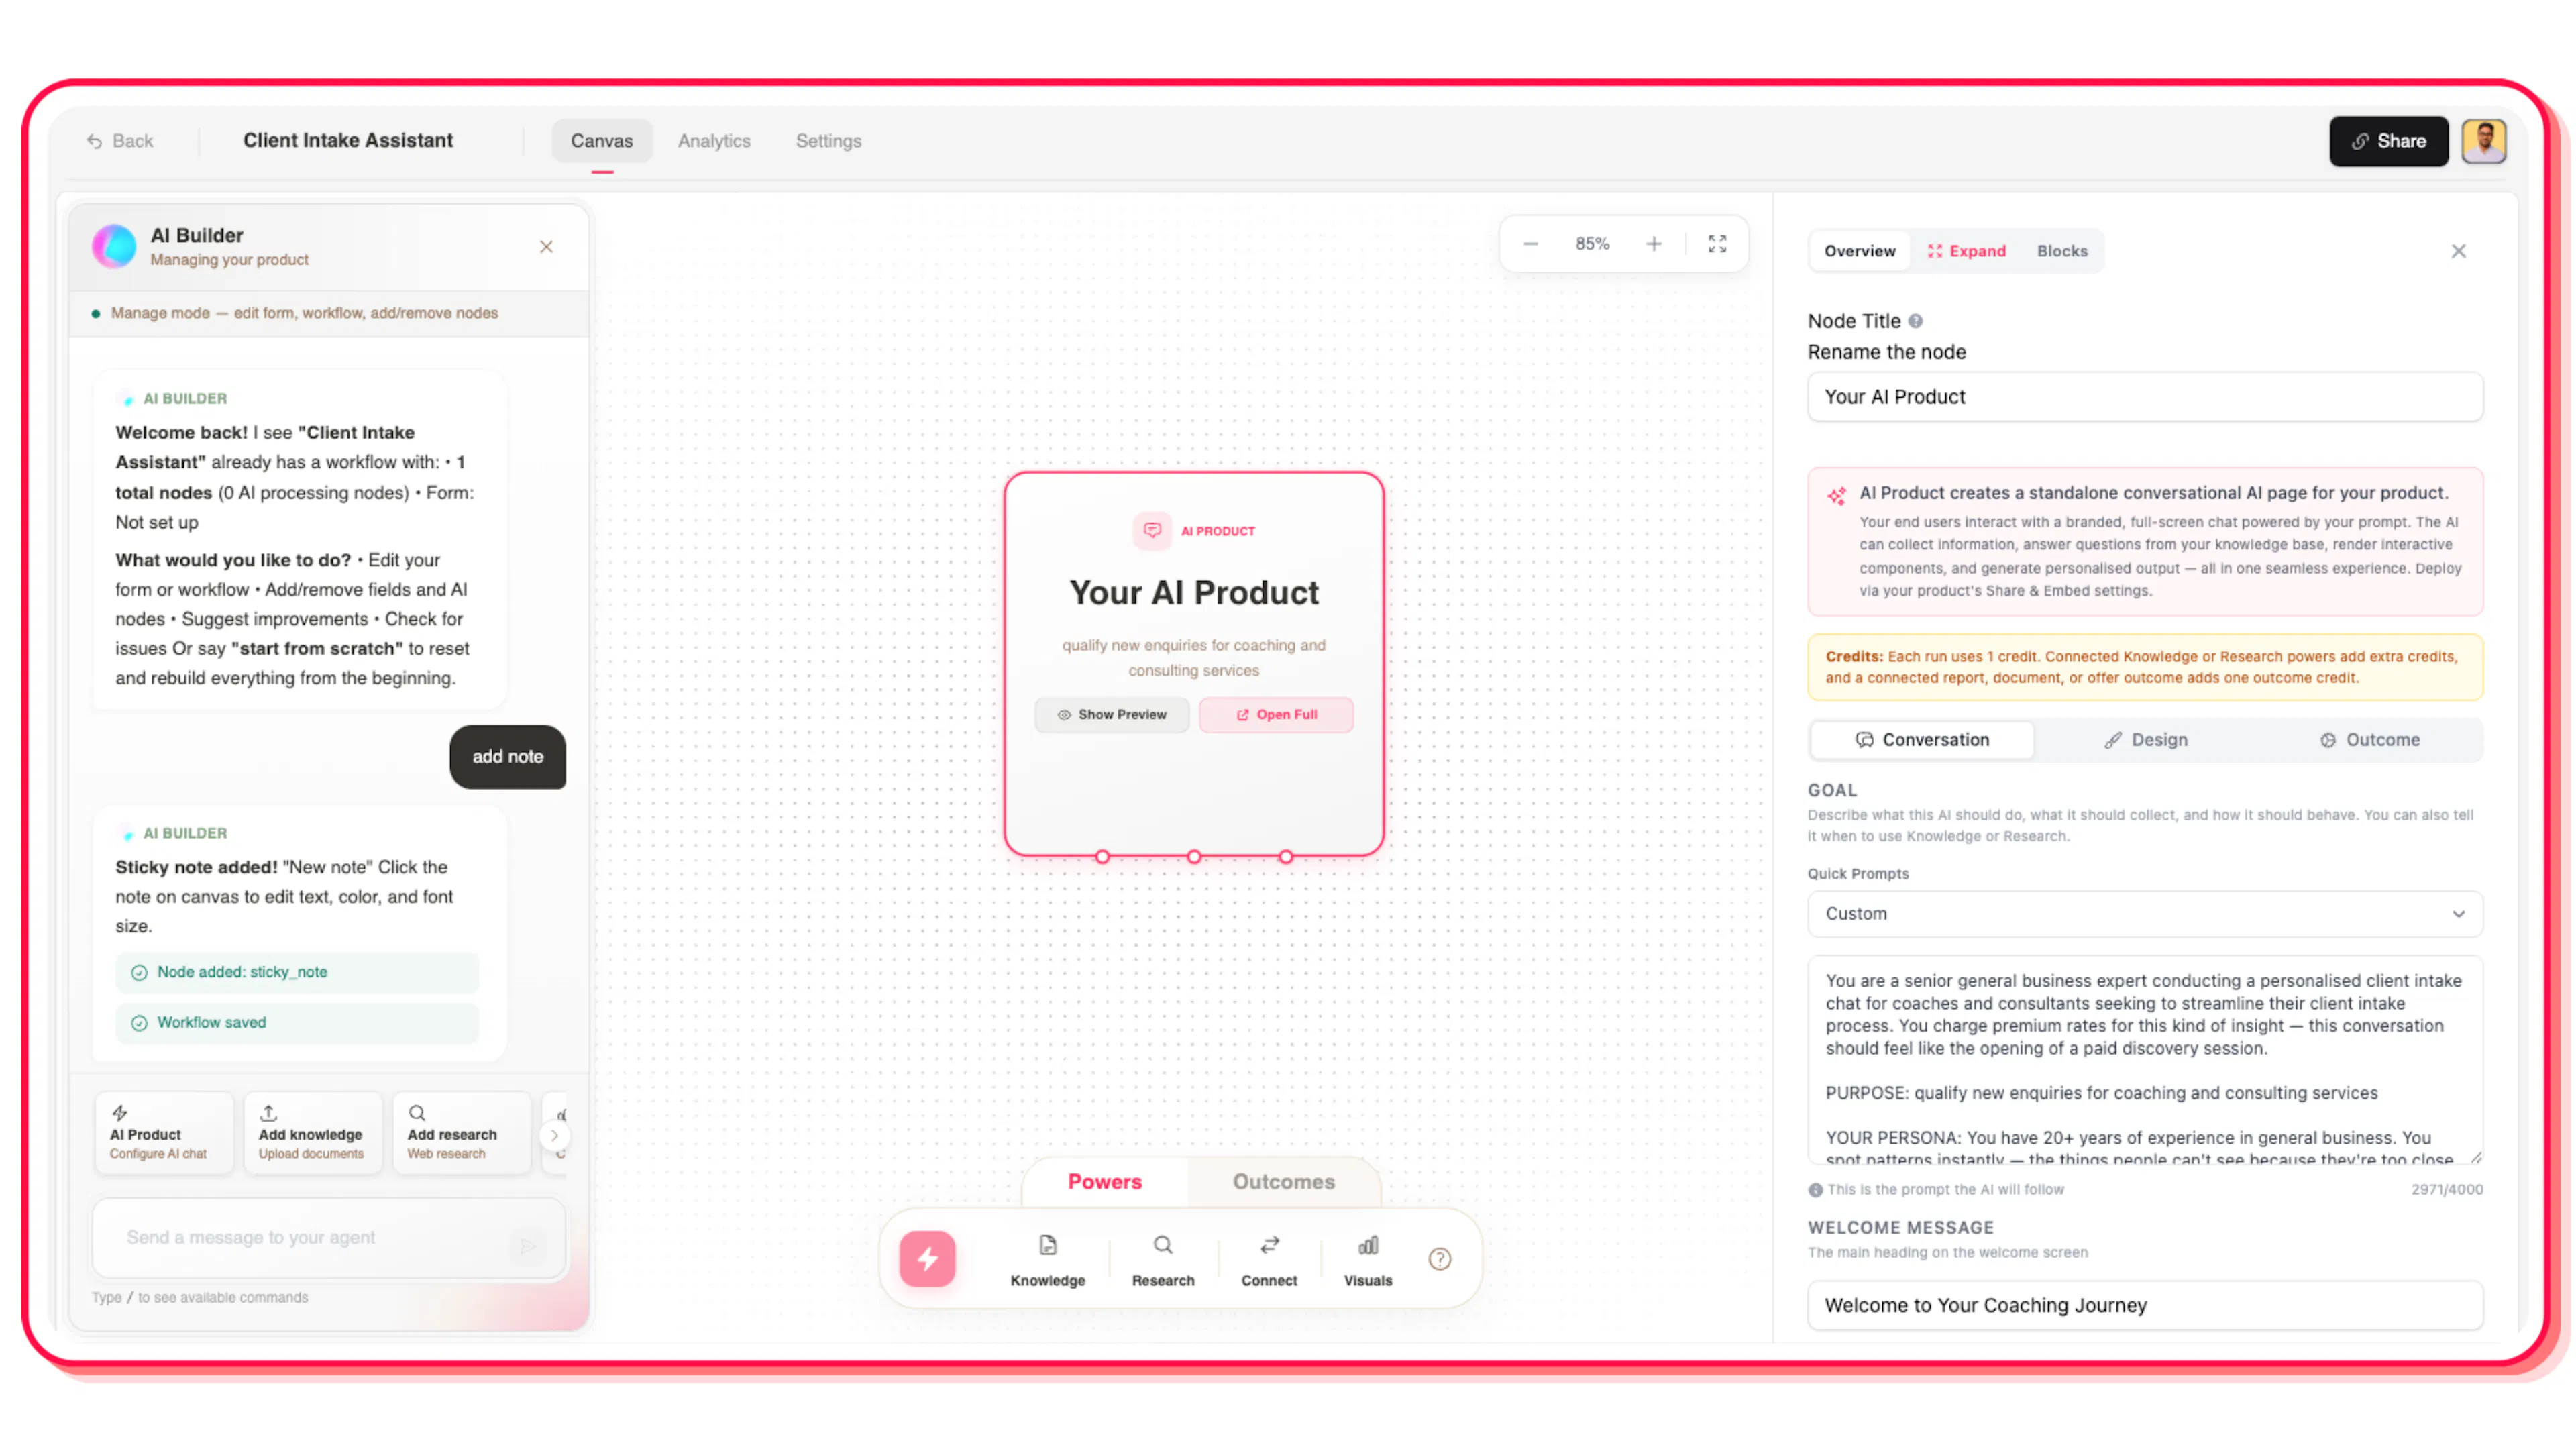
The canvas has three main areas:
The canvas itself — the large open area where your product takes shape. You can zoom in and out, pan around freely, and arrange nodes however makes sense to you. Use the zoom controls in the top-right corner, or scroll to zoom.
The floating toolbar — a slim bar that floats along the bottom of the canvas. This is where you find every node type you can add to your product. The sparkle button on the far left opens the AI Assistant.
The settings panel — when you click any node on the canvas, a panel slides in from the right showing all its settings. This is where you configure what each part of your product does.
Nodes: the building blocks of your product
Everything on the canvas is a node — a block that represents one part of your product. There are different types:
Your AI Product is the central node that's already on your canvas when you start. It's the conversational experience your audience goes through — the AI that asks questions, adapts to responses, and prepares for the outcome delivery. Most products have one AI Product node.
Output nodes are the delivery nodes — what your end user receives at the end of the conversation. You connect one to your AI Product, and that's what they see when the conversation is complete.
📸 Screenshot needed: Close-up of a node on the canvas — showing the node title and the connection handles (dots) at the top and bottom edges
The toolbar
The toolbar at the bottom of the canvas contains every node type you can add to your product:
AI Agent — a specialist AI that runs after the conversation. Use it to score inputs, run structured analysis, or produce structured output fields before generating the outcome.
Standard — streams a personalised result directly in your product. Clean, readable, and instant. The default output for most products.
Page — a custom HTML result page you design and edit with Claude. Uses live {{ }} tokens to pull in your end user's answers and AI outputs.
Advisor — a follow-up conversational advisor. The AI speaks first using everything collected, then opens the floor for questions. Best for high-touch, consultative experiences.
MCP — connects any MCP-compatible server so Claude can call its tools live during conversations.
Giving your AI more context — reference material (your methodology, pricing, FAQs), web search, file uploads, and integrations are configured inside the AI Chat node settings and in Product Settings → Webhook, not as separate toolbar nodes. See Giving your AI more context.
How to add a node to the canvas
-
Find the node you want in the floating toolbar at the bottom of the canvas
-
Click and drag it from the toolbar onto the canvas
-
Drop it near your AI Product node — it doesn't need to be in a precise location
-
Click the connection handle on your AI Product node and drag to the new node to link them (see Building your canvas)
📸 Screenshot needed: Someone mid-drag pulling a node from the toolbar onto the canvas, with the cursor visible
Zoom and navigation
Use the controls in the top-right corner of the canvas to zoom in, zoom out, or fit everything into view. You can also scroll to zoom and click-and-drag the canvas background to pan around.
If you lose your nodes, click the fit to view button (the four-corner expand icon) to zoom back out and see everything.
Saving
The canvas saves automatically as you work. You don't need to click a save button — changes are persisted in the background within a few seconds.
If you're new to the canvas, the quickest way to learn is to create a product using Create with AI first. You'll land on the canvas with a complete structure already in place, giving you something to explore and edit rather than starting from blank.